12.12.2012

Eco-Christmas Blog Hop


Hey, everyone! Thanks for stopping by my end of cyber space today. I'm playing along with Danielle and a few other crafty friends in the Eco-Christmas Blog Hop. If you stopped by here first, you can get back to the beginning by clicking here!

I love to reuse, recycle and re-purpose trash into treasure, and, boy, did this trash become a treasure!! It took about 10 minutes to complete, and the outcome was completely worth the minimal effort!


(please excuse the stove top turned photo area! 
Nighttime lighting in my house is the pits, and not conducive to picture taking!)

For this project, I used the following supplies:
  • Aluminum foil container
  • 1 piece of 12x12 scrapbooking paper (My Mind's Eye - Lush 2 - Navy)
  • 1/8" ribbon (Stampin' Up! Old Olive)
  • 1" ribbon (scraps left in my ribbon drawer)
  • Snowflake button (from my stash; optional)
  • Double sided adhesive (Glue Lines by Glue Dots)

I started by applying adhesive to one side of the box at a time, beginning at the front, and adhering the paper to the box with Glue Lines as I went along. I trimmed off the excess paper once I ended up at the front flap, and had enough scrap left to cover the ends of the box, as well.
I applied Glue Lines to the length of the 1/8" ribbon and covered the side and front edges of the box, which also covered any areas where the paper didn't quite reach.
The fuchsia ribbons was used to keep the 'lid' flap of the box closed. You could also use any sort of Velcro tabs (I couldn't find mine anywhere!). The snowflake button was adhered for decoration.

I love the color combination and the overall look of this re-purposed box! I filled mine with a co-workers favorite cookies and it made quiet the statement at our Secret Santa gift exchange yesterday!


Merry Christmas, Megan!

Here's the list of where you've already been, and where to hop to next! 

Merry Christmas, crafty friends!!

Erin: Deeply Rooted Life (you are here)
Leslie: Momma Harvey (finish up the hop here!)

11.13.2012

Cards, cards, galore!!

 While it's never fun staying away from family, I made the best of it this last weekend when I was tied up with work about an hour away from the family. I made great progress on my Christmas cards (remember this sneak peek?). I might be crazy, but I really enjoyed typing all of the sentiments on my typewriter instead of printing them on the computer. Adds to the authenticity, I guess!


Now, on to business! I wanted to show you these birthday cards I made for some family friends. His birthday is only a few days before hers, so I wanted to make cards that were unique, but still coordinated. An easy was to do this (and to make card packs that all compliment each other) is to use paper from the same line. Buy one 6x6 paper pack, and mix and match until your heart's content!
I picked up a My Mind's Eye Stella and Rose 6x6 paper pack because I loved how it ranged from masculine to feminine, while each paper still coordinated with the next. I dug through my ribbons, stickers, and fibers for complimentary embellishments, and threw their cards together in no time! It was all, of course, held together with Glue Dots!
Her card

His card
Oh, and as a side note...the hubby said that Christmas decorations could come out this weekend!!! IIiiiiiiiiiii'm dddreaming of a wwwwwwhhhite Cccccchhhhristmas!!

11.05.2012

I love sleepovers!!

Good Monday morning, people!! I'm up bright and not-so-early this morning for a couple of different reasons: I'm off work today, which automatically means no setting the alarm, and the kids had a 'sleepover' at their grandparents house, which means I was awake last night incredibly too late crafting!! It had been since my 'How to Carve a Pumpkin' page that I'd done any scrapbooking, so I grabbed some pictures and dove in.
It's funny how different art mediums and different artists styles can influence your work. I've been loving mixed media canvases for a few months now, and I found myself incorporating a lot of those techniques in this layout.

I used up a lot of scraps in the LO, too. I was pulling things from the bottom of the pile that hadn't seen light in a few years, so forgive me that I'm not sure what lines these all came out of! All of the cardstock was from one Stampin' Up! line or another, and I have no idea what paper the clouds were cut from. I found these stick pins from Little Yellow Bicycle that I hadn't used before, and I love the touch they add.
I used up quiet a few old rub-ons, adding bits and pieces around the entire LO. And if you even had to question it, all of these elements were held together by various Glue Dots!

With the busy holidays coming up, I hope you're able to get creative with your time and get crafty!! Remember, I love sleepovers!!

Thanks for stopping by today!


10.31.2012

Let it Glow, Let it Glow, Let it Glow!

It's hard for me not to continually think of Christmas right now. If I wasn't enough for myself, I've drug my mother in it, too! We try to get together at the beginning of the Holiday season every year to get a jump start on the Christmas cookie baking. This year, the timing just worked out for it to be this weekend!! The dough has been made, the cookie cutters are on stand-by, and the Christmas music is all queued up. I'm ready!
I was sorting through my baking cupboard when I stumbled across some wonderful smelling sticks of cinnamon. I rarely (ok, never...) use anything but ground cinnamon, so I was thinking of some way to put these sticks to good use.
I found an old jar candle, grabbed some Glue Lines® and ribbon, and whipped this pretty little thing up in no time!

I put two strips of Glue Lines® around the jar to make sure that the cinnamon sticks had something to hold on to, lined the jar with the sticks, then put a decorative ribbon around the outside.

It looks so pretty lit up, and it is making my house smell amazing!!!


I wrote this blog post while participating on the Glue Dots design team

10.30.2012

Easing into Christmas with Glue Dots!

Ok, ok, I'll admit it.

I've been listening to the Elf soundtrack every day for over a month on my commute to work (and I have an hour and a half commute).

I love Christmas. I'd start decorating right about now if a) my husband would let me, and b) it wouldn't make the kids ask if Santa was coming every single day. There's just such joy, anticipation, excitement and happiness around during the Holiday season that makes me want to start it as soon as possible.

Since it's technically not even Halloween yet, even though the kids went Trick-or-Treating a few days ago, there is no way it would be acceptable for me to dig out any Christmas decorations yet. I'm trying to fill that void, so it's on to making some Christmas cards! I can easily justify starting these early by calling it 'forethought' or 'good planning', even though I know better!
I love making my Christmas cards every year, and I always try to come up with some way to make the cards creative, yet super easy to make en masse. I'm kind of excited for this year's creations! They have the look of a traditional Christmas card, but the twist is that they're made out of felt!

I cut out the card base and ornament, then stitched on both of them. Glue Dots® did a great job of adhering everything together! If you've ever tried to use liquid glue on felt, there's a lot of 'show through', and you'd see the glue on the reverse. Not with Glue Dots®!
All of my words were typed out on my typewriter and adhered with Glue Lines®.


There you go! An easy way to get into the Christmas spirit, even if it's a bit early! If I forget to tell you between now and December 25th,


I wrote this blog post while participating on the Glue Dots design team

10.16.2012

T-Shirt Scarf...and New Year's Resolutions!

Well, hello, my much neglected blog!! I've missed you! If your family is anything like mine, this time of year tends to play out in fast forward, minutes feeling like seconds and a week feeling like a day. If you use this 'holiday mathematics', that means it's only been a few days since my last blog post! Ahhh, OK. Feeling much better about my absence now!


Several people have ask me about the scarf I'm donning in my profile picture (over there --->), so I'm finally getting around to doing a post about it!
It was a super easy project that I found on Pinterest. There are several styles and tutorials showing how to do this, which is good, because I forgot to take pictures after a certain point!


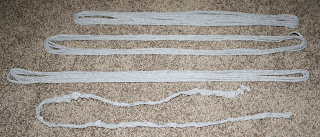
Step One: Lay out an old T-Shirt. This is one I've had incredibly too long, as evidenced by the holes in the shoulders. I made snips along the side of the shirt every inch or so as guides.
Step Two: Cut strips from one side of the shirt to the other (a rotary cutter would work wonders at this point. Too bad all I could find were my kitchen scissors!!)

 Step Three: You'll end up with strips in varying lengths due to the cut of the T-Shirt. Stretch each loop as far as it will go and sort them by their size.
 Step Three - B: Some of the loops broke, surely where the preexisting holes were. I used those pieces to braid a long strip.
Step Four: Gather all of the loops onto your hand. The loops will be long. We'll shorten them by folding the loops up, doubling what is in your hand. Loop the braided length with the scarf, using the end of it to tie all of the loops together at the back.


Maybe it's time to start some New Year's resolutions early...like blogging more often! Here's hoping!

9.15.2012

How To Carve a Pumpkin

I am LOVING this weather. I'm not sure what the weather is like in your neck of the woods, but around my house, it's a cool, breezy, gorgeous Fall day. MY FAVORITE SEASON!! I love the crunching of the leaves, the brisk air, and the excitement and anticipation of the holidays in the next few months. I'm usually not a big 'outdoors' person, but this season always tends to draw me out and enjoying God's creation.

I had an unexpected day at home without the rest of the family around, so I took full (well, almost full. I slept in!!) advantage of it and got scrapping! I've been spending the majority of my crafty time recently in mixed media, so I wanted to pull out some 12x12's and get back to my home territory for a bit.

How To Carve a Pumpkin
 I used a pumpkin cut out page that, when added to my stash, I knew was completely not my style. Even as I painstakingly finished tearing out the little noses and swirls of the die cut, I was wondering if it was even worth my time to make this work. I think it was! I cut the center out of the pumpkin die cut, making a border with it. I sprayed inked it to take away the harshness of the orange, making it blend a bit better.
Cantaloupe Twinery twine as an accent

I was at a loss when it came to the lettering. My Cricut is being lovingly taken care of by my mother, so that wasn't an option, and all of the chipboard pieces I had weren't the right color at all. I ended up tracing some chipboard letters onto paper and cutting them out, instead. Worked great!! I think I'll keep that idea stashed in the back of my noggin for future use!!
Pop Up Glue Dots for depth
The fancy cut pumpkin was popped up to a) get some clearance over the other picture, and b) to add some depth and dimension.

Stampin' Write Marker for journaling
I took advantage of some of the scrapbook paper peeking through from the background to journal little bits about the carving adventure.

I'm going to purposefully take in each day during this beautiful time of the year to appreciate, enjoy, and be thankful for every breath, every experience, and every blessing given to me. I hope you do the same!

9.11.2012

I'm a Dottess...Again!

Hey everyone!

I'm completely thrilled and excited about having a second term with Glue Dots® (here's a link to their Design Team announcement). I had a blast through this last year working with their products, and I can't wait to see what the next year has in store for us. The new team looks amazingly talented, so go check them out and be sure to follow their blog.

Congrats, ladies!!!

8.26.2012

Let Your Heart Soar

For a few weeks now, I've been praying for a friend that I left at my job in Ohio. My best way to express what's in my heart is to create, and it had been awhile since I had an evening that I: a) didn't have plans, and b) wasn't physically or mentally exhausted. I finally made some time this weekend and made this piece. 
I had kept a thought in my head from sometime this last week: someone's favorite color combination for the Fall was navy and orange (from a facebook update? Pinterest post? No clue!). I pulled out navy, burnt orange, and green paint, a 5x5 deep edge canvas, markers, and my tub of Mod Podge and got to work.

I Mod Podge'd (yes, that's a word in my house) some printed blue cardstock to the canvas, then randomly painted over 99% of it :) I felt all Christy-like and stamped with some bubble wrap I managed to sneak away from my kids. Next came random rub-on's, gel pen doodles, and some splashes of Adirondack inks.
Mr. Huey sprayed some tan onto my canvas letters to make their colors a bit more uniform, and I used my new favorite toys --my Big Brush Pens-- to write and color my chipboard heart.
These chipboard pieces were quite the find: packs of 20 or so random embossed chipboard shapes for $1. LOVE! I first painted the butterfly, then distressed it with ink, markers, and pens. I used some pop up Glue Dots to add some depth behind him:


And I loved how this simple little heart chipboard turned out, just by using the Big Brush and gel pens:


I just love how it turned out, and the best part?? It's SO easy to do! The less perfect, the better, which IS perfection, in my books!


8.08.2012

Hi Girly Face!

I finally got a chance to read through my latest issue of Paper Crafts Magazine, and I felt the creative urge to get back to craft land a make something whimsical and fun. I had a basic idea in my head, and here's what I came up with!
Girly Face 'Hi"

This little Girly Face was sketched onto a dictionary page and cut out. I used Faber Castell gelatos for the cheeks, and I used Faber Castell Artist Big Brush Pens to color the scrap doily hair. Buttons for eyes, scrap papers from My Mind's Eye (Stella Rose) for the backgrounds, paper tape from Recollections for decoration and Thickers letters complete the card. I adhered everything with Mini Glue Dots.

I think she's a lot of fun!! Can't wait to have more time to make her some little friends and get a card pack together!

7.31.2012

Quick and Easy Birthday Decor!

Subway Art
After I finished my wall decor last week, it turned out that I had a few extra frames that didn't make the cut. I wanted to utilize them somehow, so I thought I'd made some super easy birthday wall hangings.
I'm seeing Subway Art around like crazy, so I took some inspiration from that for this first project:


This was so easy!! I took a few pieces of bakers twine (The Twinery), some chipboard letters (K&Company) and glued them together using Mini Glue Dots®. Simple and completely customizable!


For my next frame, I knew that I wanted to use some of the super cute paper from the DCVW stack Celebration. I trimmed the paper to fit and added my 'Happy Birthday' phrase using Micro Glue Dots®. Love it!!!

As a frame on my decor wall
Don't over think your next party. These are easy and quick ways to decorate for your celebration -- without breaking the bank!!

I wrote this blog post while participating on the Glue Dots® Design Team

7.21.2012

Another Pinterest Project!

Hello, hello, hello!

I figured that I was on a roll taking on new projects this last week (did you see my mixed media canvas??), so I decided to try and continue the trend! I've been eying a Pinterest idea for months now, and finally got around to trying it out.
I went to a second hand store and lucked out -- all of their pictures and frames were 50% off!! Add those to a few from my mother in law and a few (including the huge one!) my hubby found at a flea market, and you get this eclectic bunch:
I was looking for frames of all sizes, textures, and shapes, rather than focusing on color. I took the backing off the ones that had pictures in them and gave them all a good coat of flat black spray paint.


Next is the fun part!! Have some frame fun before they go on the wall!


Now to the hanging...
Wall - Before. Blah!!

Wall - After!
With the light off

This was so fun and easy to do!!! Walking past it just makes me smile.

Shouldn't every part of your house do that??

7.19.2012

Breaking it Down, Mixed Media Style!


Hello again! I'll warn you from the beginning; this will be a super long post!! I'm going to try my best to explain, step by step, my creating the mixed media canvases I shared in my last post. 
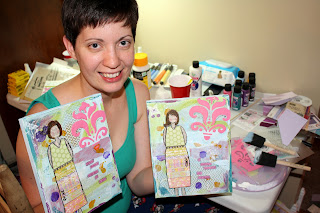
C'est moi. Forgive the bags under my eyes, this was very late/very early!

The great thing I've already learned about mixed media is that you can use so many things that are considered scrap or trash. Paper, ribbons, rub-on's...the left over bits and bobs make the best materials for these projects.  
 
Here's a list of the supplies that I gathered to get started: 
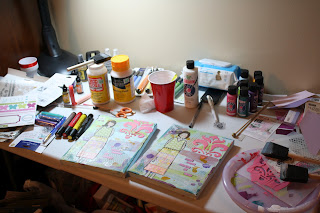
My mess of a craft table. Somehow, it works.

Mod Podge (or something of the like). You'll be gooping this stuff on, so you might as well get the big bottle! I've seen 'recipes' to make this at home, so check back for a post on that excursion later! 
Acrylic Paints. The cheap kind works great. I got mine for around 70 cents a bottle, so go all Roy G Biv in the paint aisle and stock up. 
Paper. Again, scraps work great. Unless you're looking for a specific pattern or have something already in mind, pick through your scraps for this. 
Canvas. Any size, and shape, and again, get the cheap ones. I'm sure the expensive ones are 'nicer', but you're seriously covering it in paint and glue up to your eyeballs. Go cheap and just buy more :) 
Paintbrushes. I picked up a multi-pack of the foam brushes for this go-round, but I'll be getting some bristle brushes for the next time. The foam soaks up whatever you're working with too much for my tastes. 
Modeling Paste. This can get pretty pricey at the craft store. The jars I've seen are around $20 each; I lucked out and found a bottle of it on clearance. This is a good product to whip out your 40% off coupon for. It's worth the splurge! You'll also need something to spread the paste on with, but don't buy anything special. I used an old, plastic library card. What better re-purpose for those fake credit cards that come in the mail!?! 
Stencils. This is another item that comes in a variety of price points. There are some designed specifically for crafting (The Crafter's Workshop), which I did use on this project, but I also used a stencil that I picked up at my local super center on clearance for 25 cents! 
Pen. I've yet to see the pen that Christy (haha...we're on a first name basis now somehow!) recommends and sells in her store out-and-about anywhere, so I tried my luck with a normal ball point pen. Worked great!! She does talk about how her recommended pen will still write when your canvas isn't 100% dry, but I didn't come across a problem using mine. 
Markers. OK. I'm going to admit this now and get it out of the way. After watching Christy's video a zillion-ish times, I bought every color of the Faber-Castell Artist Big Brush Pens that I could get my hands on. Granted, they were on sale at 40% off and free shipping, but they still made a dent in the {non-existent} crafting budget. Minimum, I'd suggest getting black (to outline), brown, yellow and red (for hair colors). These are amazing pens that use India Ink, which allows them to blend fabulously. Love, love, love. I also pulled out a few Faber-Castell gelatos to use for the cheeks :)
Rub-on's. Any and all will do. These are a great way to add visual texture with intricate designs with no effort at all. You can use scraps of rub-on's, designs you're not interested in putting on layouts or cards, really anything.  
Sprays/Inks. Any kind. It's just to add visual interest. 

So the list seems long, but it's really only a few items for such an amazing piece! Of course, you can add fibers, ribbons, and anything else your little heart desires.  
 

Let 's get started! 
 
The first step is to adhere your paper to the canvas with Mod Podge. Feel free to tear different sizes, shapes and patterns. You don't have to cover every inch of your canvas, but use enough to establish a good background. The trick to Mod Podge is to put a layer under AND over what you're adhering down. Under makes it stick, over makes it stay. It dries fairly quickly, but make sure it's dry before moving on. A blow drier works wonders. 
 
Step two: paint it up. I knew I wanted my background to have an overall blue-ish tone to it, even though I used greens, reds and whites in my paper. Take some acrylic paints, and give your canvas an all-over light coat. Don't worry about streaks, that adds to the texture. Some areas can be darker, some lighter. Have fun with this part! I gave the sides of my canvas a light coat (using my fingers) of the blue while I was at it. 
Feel free to grab some other colors and get those on there, too. Get your fingers messy and get creative! 
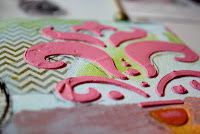
Stenciled modeling paste
Three: stencils and paste. Use them with your paints for visual interest, and use them with modeling paste for depth! Modeling paste comes white, but just use any color of your paints (or splurge on some ink to drop in for a more vivid color) mixed into it. Grab your library card (ha!), scoop some up , place your stencil, and gloop it on! The thicker you apply the paste, the more depth you'll end up with. It's always an amazing feeling to spread that stuff on, pull back your stencil, and see such an amazing, easy effect!!! 

I applied the modeling paste once I was satisfied with how the canvas was looking, because I knew this would take the longest to dry. I used the hair drier on it for a few minutes, but then ended up just working around it for the rest of the piece to let it completely dry. 
 
Fourth (but could be at any point): Sprays and inks. Add as little or as much as you'd like.  
 
Next: the girl! The design of this girl is 100% Christy. I'm not even going to pretend that I had any creative insight in this portion!! This part is my favorite because it's when you see this crazy conglomeration of colors, patterns and textures all come together to make an amazing piece of art. 
Head/neck, arms, legs: These are cut out of an old book. Mine happens to be a dictionary that I've been tearing out of for years. Don't worry about getting anything shaped perfectly, you'll be tracing around it with your markers later. 
Shirt and Skirt: cut each out of paper of differing patterns for contrast. I think this is one area that I'll need a little more practice in, because I didn't end up giving either of my ladies a very flattering figure! 
She gets Mod Podge'd down (remember, under and over!) and left to dry. 

 
Lastly, finishing touches! This is where I pulled out my pen to doodle in random areas around the canvas, applied rub-on's in various spots, and got to try out my new markers! 
I used the black to outline completely around the girl, then went in with brown, black and red for her hair. 
I cut apart a sticker with a phrase on it, added those on (they stuck very well without any other adhesive than their own), and marked around them with my pen, and was finished!! 


I don't know that I've ever been as excited about the results of a project - ever. I didn't expect the process to go as smoothly as it did or to turn out as well as it did. I woke up several times through the night (and even got out of bed to look at them again) to try and add fibers to it...lace on the skirt, ribbon around the bottom...but finally convinced myself that there would be more canvases and more projects that I could add plenty of different things to. 

And there will be :)