Showing posts with label crafts. Show all posts

8.17.2013

You Are The Light of the World!!


 Well, school has gotten off to a great start in the Deeply Rooted household!! My little man loves his teacher, and comes home with stories of new things he's learned and done every day. He's really excited right now, because his 5th birthday is next week! He knows he's bringing in cupcakes, but he has no idea they're going to be those cute minion ones that have been all over Pinterest. I'm crossing my fingers they come out well!!

I'm always sad when the Dottess term comes to an end, but I have high hopes to be returning again next year!! I really wanted to go out with a 'bang' with this last project, and I've had this idea floating around in my head for awhile now. I saw it on Pinterest back in the day with Pinterest just started, and I haven't been able to find it again since!

So the story starts like this: I came home from work one day, and the kids were kicking this metal globe around in the yard. Random, right? The idea of this project popped back into my head, but I figured this globe was already past it's prime after the swift kicks from my children. I began the not-so-intense search for an old, a little more gently cared for globe, and came up empty. Seeming as I had little other choices, I asked my handyman to take the two halves of the globe apart, while sparing at least one half's life, and affix it to some old wood. He got my vision perfectly!
Next, I got all of my supplies together. Making Memories Canvas letters, Tim Holtz Alpha-Parts, and my Ultra-Thin Glue Dots®. I know all the of letters I was using were self-adhesive, but I'm never a fan of not reinforcing things, especially when they're being used on home decor items. The Ultra-Thin Glue Dots® give the hold I need, without adding bulk under the letters. I adhered them all down to a piece of heavy craft cardstock and cut them out.

I'll admit, I have a new-found appreciation for Pop-Up Glue Dots®!! I've used them on scrapbook pages and canvas work before, but I LOVED them on this project! I don't have to remind you that the globe I was working on is round. Not an easy shape to work with. I loaded up the backs of the words with the Pop-Up Glue Dots®, and they stuck AMAZINGLY well. Seriously thrilled.

The only place I added a little support behind the word is with 'world'. A lot of the word was not adhered to the globe (again, due to the round-ness I was dealing with). I used a small piece of the craft cardstock I was working with and made a little support, again, adhered with Pop-Up Glue Dots®.

Here are a few more views of the finished product:


So I kind of love it!! I'm a little sad that I didn't have the hubs try and save the other half! LOL!

I can't wait until there's more news about the next Glue Dots Dottess term, and trust me, I'll keep you updated!! I'll be back soon with pictures and a post about my little man's party. He decided he didn't like anything in the world more than his favorite color of green, so he's having a green party!!

Until next time!!


I wrote this blog post while participating on the Glue Dots® Design Team

5.01.2012

Mother's Day Made Easy!

Hi there! I’m finally back to help this poor blog feel a little less neglected (it has been) and a little more loved (because it is!) For those of you curious about the Deeply Rooted house, remodeling is almost done, and we’ll be moving in next week! Anything not finished by D-Day will surely get put on “The List”, and I’m sure we’ll get around to doing it sometime in the next few years.


While I’ve been busy working away, either at the new job or at the house, I’ve spared some time for my little lovelies…Glue Dots! Let me just tell you, I love this company!! The folks at Glue Dots recently put together little care packages for each design team member, and each and every goodie was so appreciated!


Mother’s Day is fast approaching, and my friends at Glue Dots wanted to see how we could use their wonderful adhesives to make quick and easy presents to celebrate Mom. My first project is for all of you ‘greenies’ (aka up-cyclers, re-users or salvage Sallys!). Gift cards are a quick and easy way to give someone a gift you know they’ll love, but they can oftentimes feel impersonal. Show Mom you care by taking a few minutes to make a simple, thoughtful gift card holder out of (none other than) a toilet paper roll!


Prep Time Needed: A Few Days (or as long as it takes your family to use up a roll of toilet paper!)
Project Time Needed: less than 5 minutes


Trim the paper to fit your cardboard roll. I used a paper with a nice pattern on it so I wouldn’t have to worry about much extra time and material for decoration. Using your Continuous Glue Line
®, apply glue to all four edges of your cut-to-fit paper. Line your paper up with the roll and adhere all the way around the cardboard tube. Fold each edge of the tube in on itself, making a pillow shape. Cut and attach ribbon (or any other decorations you’d prefer) using Craft Glue Dots®
Materials Used:
Toilet Paper Tube
My Mind's Eye Lost and Found - Market Street 6x6 Paper Pad
Stampin' Up! Fairy Tale Ribbon
Making Memories Sentiments Embossed Charms
Glue Dots Continuous Lines
®
Craft Glue Dots®


For my second project, I solved a beautiful dilemma. I knew I wanted to get my mother a fun new baking pan, but, really…how ‘fun’ does a baking pan ever look?? Boring, grey, blah, right? I looked at the pan, looked at my stash of crafting fun, and (somewhat brilliantly, I might add) came up with the idea of using the pan just like the ever-so-popular crafting trays! You’ve seen them, right? They’re printing press-esque trays that you add paper, trinkets, and pictures to, but who said they had to be done in a tray?!?


I cut out some My Mind's Eye papers to fit the bottoms of the pan and used a packet of die cuts from Heidi Grace as my little embellies. I even found these cute little laser cut wooden kitchen utensils from Kaiser Crafts to add on! Most importantly, everything is adhered using Removable Glue Dots®, so there’ll be no stickiness left in the pan when Mom's ready to use it (for its intended purpose, that is), and EVEN MORE importantly, My Mom the Crafter can reuse all of the papers and pretties on the tray in her own crafting magical creations!
 

Materials Used:
Removable Glue Dots®
Pampered Chef Brownie Pan
My Mind's Eye Lost and Found - Market Street 6x6 Paper Pad
Heidi Grace Daydream Die Cut Accents
Making Memories Sentiments Embossed Charms
My Mind's Eye Stella Rose Trim
Stampin' Up! Fairy Tale Ribbon
Kaiser Crafts Wooden Flourish - Kitchen Utensils
{my momma!}

So, as this project is for my actual mother for Mother's Day (and she's seeing this before I've actually had a chance to give it to her), HAPPY MOTHER'S DAY, MOM!!

Well, there you go, fellow crafters. Two quick and easy ideas to make your mother feel special, loved, and like she should bake something good for you to eat!!

2.29.2012

Another St. Patrick's Day Treat!

It's a little known secret that my dream vacation is to Ireland. It's even in the top 5 on my bucket list! I love that Glue Dots® wanted us to make them a few St. Patrick's Day projects this month. I had a great time coming up with the four leaf clover hair clip I showed you yesterday, and this project was fun, too!

If you've been following me recently, you know that I'm in the process of moving, and all of my craft goodies are packed away! I perused Michael's for a quick project that wouldn't need too many supplies, and came up with this neat jumbo clip!
Side note: try creating with the tornadic mess my kids left behind (and didn't clean up before bed time!!). Whew!!


Supplies:
  • Jumbo Clip
  • Wooden Heart Shapes
  • Green Paint, brush
  • Ink for distressing
  • Fibers (I ended up just using baker's twine)

Lightly paint the wooden pieces (I liked leaving a bit of the wood grain showing). Make sure you paint the majority of the back, too (the sides stick off of the clip). I used my ink to edge the hearts and a bit on the fronts for distressing.


Use your Craft Glue Dots® to adhere the hearts to the clip. I wrapped a bit o' twine (bwa ha ha!) around the top for some texture, printed out, cut and distressed my words, and cut some felt for the clover stem (also adhered with Craft Glue Dots®).

I can't wait to use this in my future new craft room! Happy {early} St. Patrick's Day, everyone!!

I wrote this blog post while participating on the Glue Dots® Design Team.

1.30.2012

M-I-N-N-I-E M-O-U-S-E!!!!

Ok, I realize the song is M-I-C-K-E-Y M-O-U-S-E, but this weekend at the Deeply Rooted House, it's was all about Minnie and a birthday party for a sweet little girl!

Her birthday isn't actually for a few weeks, but we'll be in a post-moving frenzy at that point, so we decided to celebrate a bit early.

There's more in here, right??


Love these Melissa and Doug dress up dolls!


Now, if you've seen my previous posts on this little missy's first birthday party (with the owl cake), or her older brother's Word World cake, you've seen that cakes are my 'thing' for their parties. I love making them, taking oodles and oodles of way-too-much time to make them completely awesome. And this year?

Epic fail.

So you've heard we're moving, right? Last week of work, packing, stress, and a busy (i-had-to-go-to-a-stampin'-up-party-that-morinig) day? Time escaped me, and alas, the cake didn't happen.
Cupcakes, however, did:


Did you know that when you put a Starburst in the microwave for 19 seconds, it becomes a pliable, but not-yet-sticky molding putty? I did!!! Chocolate wafers for the ears, white chocolate chips for the dots, and molded Starbursts for the bows. Yum!!

As crunched for time as I was, I did have a few minutes to make some totally cute party favors for all of the kids:


I decided I had enough time to make these about 15 minutes before the party started!! They're super, super easy!!

1. Cut circles from craft foam (I used one of the paper cups for the party to trace a circle)
2. Cut a curve from the circle so it will fit to the headband
3. Apply a 1" Glue Line® to the curve on the craft foam, adhere to the headband.

To go from 'Mickey' to 'Minnie', make a bow and stick it on between the ears using a Craft Glue Dot®.


Even after the party, they'll still love to play with them!

Another way to easily customize your party is to make cup cozies!


I used a coffee cup cozie as a template and traced that onto my patterned paper:

I used the Mickey Font cartridge on my Cricut to cut the Mickey shape with the '2'. While I was hurriedly cutting foam ears (remember? Just before the party started?), my husband stole the 1" Glue Strips®, glued these to fit the cups, and grabbed the Mini Glue Dots® to stick the shape on. 


Parties can be exhausting! At least I always have six months to recover from one child's birthday before the next one rolls around!!


I wrote this blog post while participating on the Glue Dots® design team.

1.07.2012

Snow Days Blog Hop * Day 2!

We're so happy you could join us for Day Two of this super-fun hop showcasing cards, layouts and projects that feature everything about Snow Days!! You'll find an array of ideas throughout the hop -- We hope you'll enjoy each and every project along the way!!

If you'd like to join our Snow Days Fun, then you are in the right place. Keep alert for blog candy along the way as some hop stops will be offering some goodies...

For Day Two of the hop, I've re-purposed a Christmas card into an ATC (Artist Trading Card)! I had my first try at ATC's here with Friendship's Garden. I always hate throwing out (or worse yet, storing for no apparent purpose) Christmas cards every year, but I'd never come across a reason to keep them...until now! Depending on the design on the Christmas card, you can easily make two to three ATC's per card and end up with an entire set by the end of the Season!

 I fancy cut around one of the trees to be able to pop it up off of the card a bit. All of the elements here are from the Christmas card, with the addition of a bit of ric rac trim, colored staples and some Stickles for a bit of shine! I stuck everything down with Glue Dots.
Hope you've enjoyed Day Two here at the Snow Days Blog Hop. Thanks for coming by! Hope you haven't thrown out those Christmas cards yet!!   ... Now hop on over to Amy!

Here's a list of the entire hop, in case you get lost along the way or want to revisit anyone:

12.21.2011

My First Mixed Media Canvas and a HUGE Thank You!


Here it is!! My first mixed media canvas. I had a lot of fun making this. I did it in several steps, spanning over at least a week. I like to be able to do a layer, step back and take a second look at it, and come back to it with a fresh perspective (plus I needed a lot of drying time in between!). I have to admit that I got a lot of inspiration from a fabulously talented artist/designer/everything else named Mou Saha. Go check out her blog sometime. It's definitely worth linking up to! (and I'll just go ahead and admit now that attending one of her classes in Florida is on my bucket list!!)
This canvas was a Christmas present to a wonderful friend who is taking life by the horns and really proving and shaping themselves right now. I wanted to make something that would be an inspiration during the hard times and somewhat decent to look at during the good times :) Luckily, we exchanged gifts early this year, so I can finally post about this project!!!


I feel like I've crossed over from making projects to actually creating something with this piece. For the first time, I understand what artists feel when they are composing artwork. Each element, from the dress pattern layers to the color underneath, the images to the fibers, mean something to me. Every item added to this canvas has a meaning. And while someone might not 'get it', or even appreciate anything about it, to me, it means a lot (and hopefully to the recipient, too!!)

Babble, babble, babble, right?? Ok. On to the steps.

Step One: Prime canvas with gesso, let dry (overnight-ish). This particular canvas came pre-primed, but I'd rather play it safe.


Step Two: Get crazy with gelatos!! Faber Castell makes these amazing little color sticks called gelatos (more info about them here). They go on like a crayon, and once they're wet, they blend amazingly! I tried several different methods to blend my colors (wet paintbrush, baby wipes, fingers) and ended up liking using my hands the best. It was a lot easier to control how much got blended. Once you're happy with the coloring, let dry (doesn't take very long!)


Step Three: Next I decoupaged old dress patterns onto the entire canvas (they're in the bottom of that picture up there). No real rhyme or reason to this part, just overlapping a bit as a go. Drying time for this was a few days!


Step Four: Play!! Once your canvas background is all ready, you get to create and play! I inked up some Grungeboard letters and used some Grungepaper through the Cricut to cut out the bird house (from the Serenade cartridge). The bird was cut from the Serenade cartridge from cardstock, traced onto a piece of plain muslin, and decoupaged onto the canvas.


added some curled wire for detail
popped this off the canvas slightly


inspirational phrase


I can't wait for inspiration and a few extra days to work on my next one. I think I'm hooked!! (plus my canvas came in a two pack!)


This will definitely be my last post before I'm off on a holiday for a bit. Thanks, everyone, for a GREAT 2011! A huge thank you to Glue Dots and Becky at Friendship's Garden for taking me on as a designer this term. This blog was started because of you all, and it's turning out to be such an amazing journey!! 

I'm looking forward to all 2012 has in store. It's going to be a great year!! Merry Christmas!!

12.20.2011

All Aboard the Polar Express!!


Toot tooooooot!!!!!


I have to admit, I've never seen the movie. I probably should. Pretty soon my kids will be to the age where they'd find that mesmerizing! In fact, not too far from our town, there's a place that reenacts the Polar Express, complete with a train ride to the North Pole (you can check that out here). I'm sure they'll love that in the coming years.

A friend of mine wanted to take her three grandchildren to this Polar Express event, and asked if I would make tickets for them.

Would I???

OF COURSE!!

Now remember, I've never seen the movie (I'm pretty sure the book had been read to me once upon a time, but that wasn't enough at this point). I Googled away, and came upon this great packet someone else had already made up, and it included the images of the actual tickets used in the movie! I'm not one to reinvent the wheel (why make more work for yourself!?) so I used these:

Reproducible Image from http://www.hmhbooks.com/features/thepolarexpress/pdf/polarpartykit.pdf

Now, here come the part I lllooooooovvvveeee!! Print it on paper? These will be given to kids. Torn and wrinkled in two seconds. Nooo, no, no, no. I had a better idea:


Grungepaper.

Yup, this is going to be awesome.

So. Grungepaper. Never heard of it? It's in the Tim Holtz line of Grungeboard, described as "a thinner form of Grungeboard with the same grungeable properties". Love. It. Completely pliable, able to alter in tons of ways, including writing, sewing, stamping and inking it (like printer ink?? You see where my mind's heading here...)

Off to the printer I went! I used a laser printer, if that matters to you folks, and this is what I came out with:


(I am in love)


I knew that my Stampin' Write markers from Stampin' Up! worked really well on Grungeboard (no pen lines, blends perfectly!), so I tested it on a scrap of the Grungepaper: worked like a charm!! I cut the ticket out and colored it to appear gold (like in the movie, I'm told) and then did some Christmas-y colors on the holly and ivy. The bell got a little daub of Champagne Mist Shimmer Paint


I added a rolled up letter from Santa and some awesomely huge jingle bells to finish it off.


I can't wait to make these for my own kids someday soon!!

Make sure you stop back by tomorrow...I'm giving out one of my favorite creations tomorrow, so I can finally blog about it!! (Can you say MIXED MEDIA?!?)

12.19.2011

Handmade Christmas Giving...Pinterest Style!

Merry Christmas!! I'll probably have another project to post between now and when the Big Guy arrives from Christmastown, but I'll say it now, just in case!

We did a lot of 'name drawing' this year for family Christmases. I love this idea, because it not only simplifies the shopping experience, it gives a little reminder that presents aren't the reason for the season. Along with having a specific person to get a gift for, there was a limit on $$. Twenty dollars used to buy a lot in this world (and I'll stop there, risking sounding like my grandparents).
Anyhow, I was able to find a cute bag to benefit breast cancer (found online here), and it was only half of the budget. I wanted to do something crafty (imagine that), and to get my creativity flowing, I went a-Pinterest-ing for ideas -- and found this yard wrapped letter. I can do that!


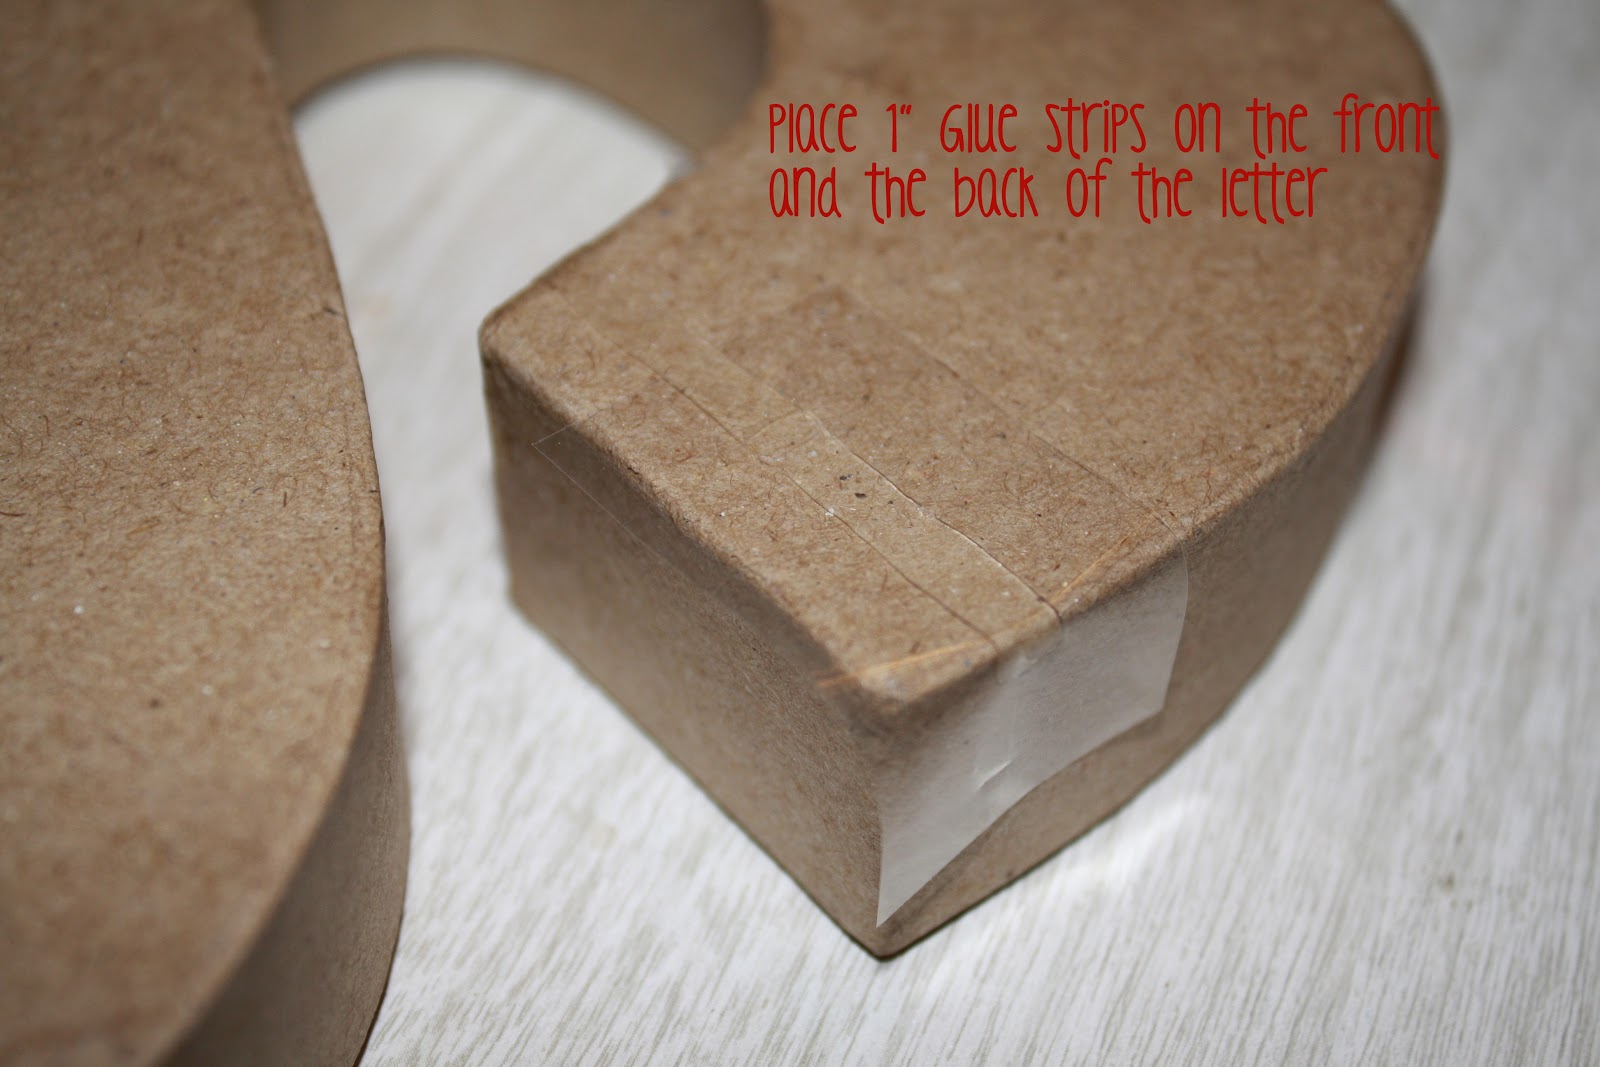
 I used a couple of the Glue Lines occasionally through the wrapping process when my hands needed a break from holding the yarn (or when one of my kids needed me!)


Whew!! Ok, so I was a little ambitious using an 'S' as my first go at this! The curves were admittedly tricky. Too bad her name didn't start with an 'I'...
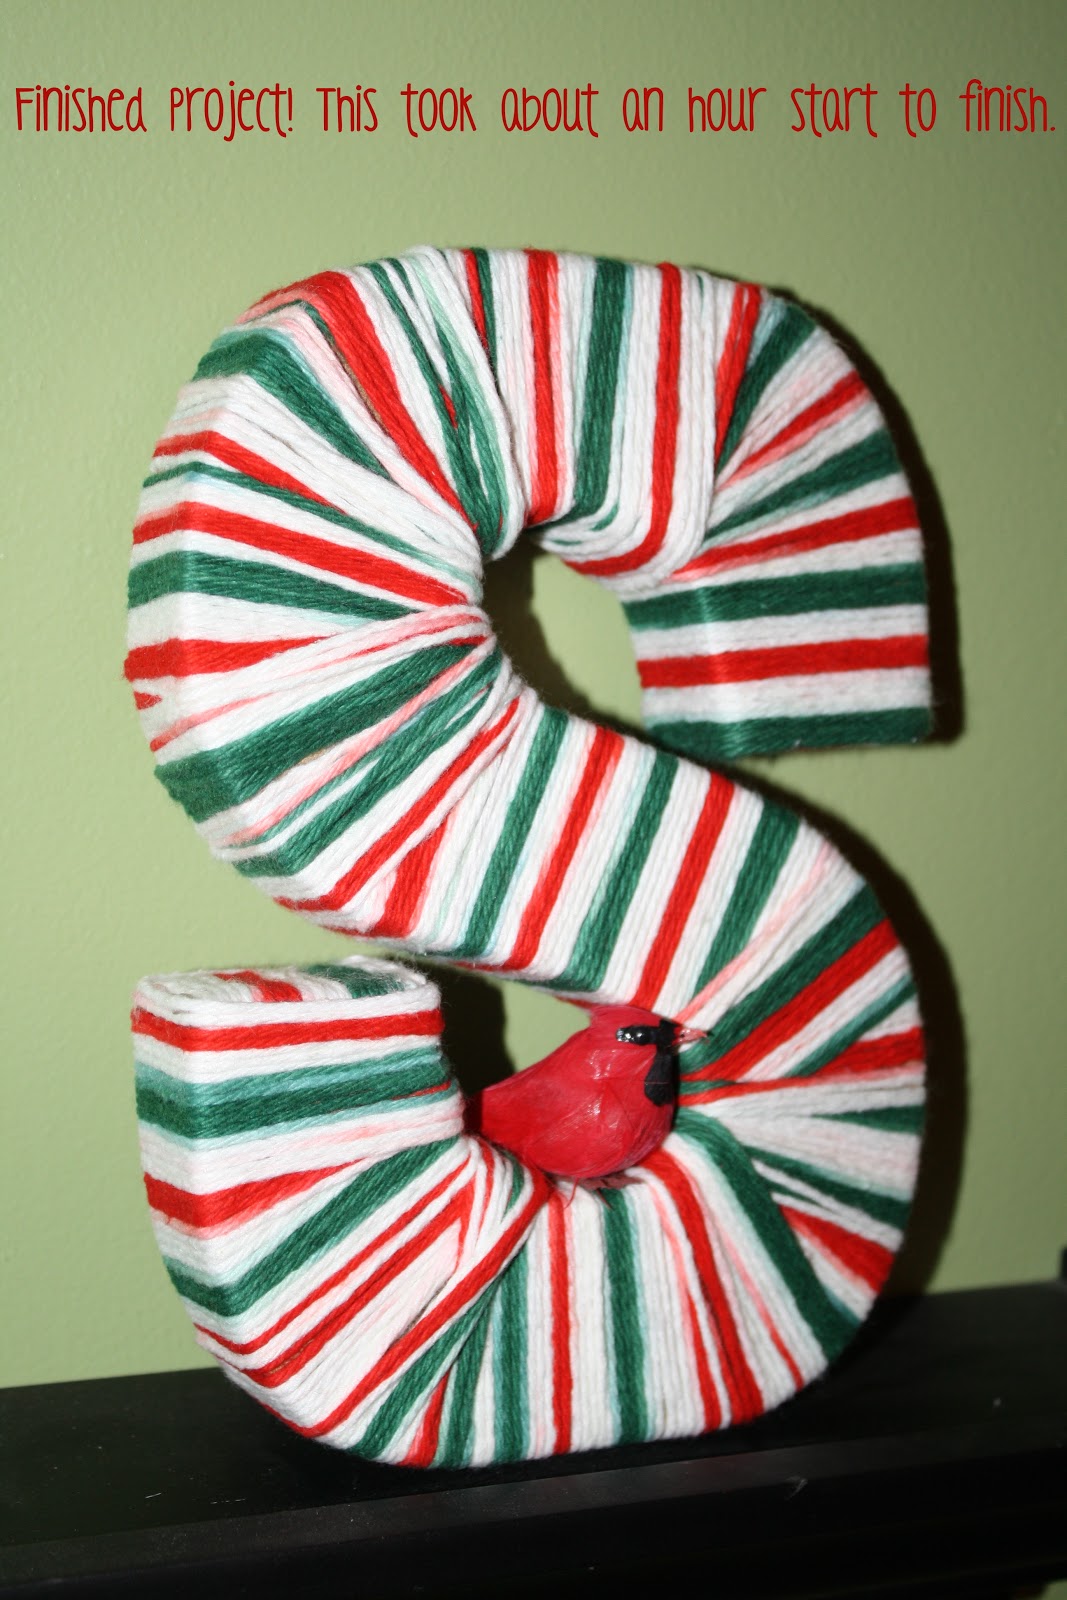
Anyhow, I added her favorite little cardinal bird onto the bottom of the finished 'S', and here you go:


I love how this turned out, even with the bumpy curves. Using a solid colored instead of the variegated yarn might have hidden my mistakes a little better. I'm sure practice makes perfect for these cute little things! If you're looking for a quick, easy (unless their names starts with an 'S') project, I promise your craft store won't be sold out of yard and paper mache letters like Toys R Us is sold out of Leap Pads!